 |
Installation Instructions |
 |
|
Installation Instructions |
|
|
|
|
|
|
|
| First things First |
| Replacing your worn out automotive carpet is fairly easy once you determine the items that must be removed to do the job. It can be done by one person in a long afternoon. Before starting any project it is good to check that you have the correct parts. In this case make sure the replacement carpet is the correct color and is made for your specific vehicle. Remove your new carpet from the box, try not to tear the box in case you have to return the carpet. Lay it out flat in the sun for a couple of hours to let the folds smooth out and be easier to work with. While the carpet is warming up, you can get started by removing the negative battery cables to shut off the interior lights so your won't drain the battery. |
| Tools Required |
|
| Stay Organized |
| There is nothing more frustrating than not being able to locate the correct fasteners to reinstall the parts you just removed to replace your carpet. Prevent this from happening by placing the fasteners for each part you remove in a plastic bag, cup or whatever you have handy and keeping them with the part removed. This will save you time when reinstalling items removed. |
| Removing the Seats |
| Start by removing the front seats. In most applications they are bolted at 4 points to the floor. The nuts are usually accessible through holes in the floor from underneath the vehicle. There may be a pop off cover over the bolts. In some newer cars the seats are attached to tracks that are bolted to the floors. Move to the rear seat. In most cars you must remove the bottom first. Grab it in one corner and give a good tug upwards. If it doesn't pop up there may be some kind of clip or latch in the center of each passenger cushion. Get a light in there so you can see it. Should be a push pin to release the seat. The upper rear seat is usually hung on a bracket or brackets at the top and held on by fasteners on the bottom. |
| Removing Seat Belts |
| Once the seats are out, let's move to the seat belts. With the seats removed, the bolts attaching the seat belts should be exposed. On older cars, one side of the belt will be attached to the floor and the other side to the frame rail. Both will need to be removed. On cars with a shoulder harnesses, only one side of the belt needs to come out. The bolt should take a socket on older cars or a torx bit for newer ones. If you dont have the proper size, find an allen wrench that will fit into the torx bolt and take it to your local tool store and use it the find the correct bit. They are designated as T 25, T 30, etc. with most seat belts using a T 50. |
| Top |
| Removing Interior Trim, Kick Panels and Sill Plates |
| The interior trim panels are next, start with the door sill plate by first removing the screws holding it to the body and sliding a wide blade screw driver under on end away from any paint and pry up. The panel should come lose, work your way to the other end prying as needed. Remove the kick panel trim on both sides by removing the attaching screws. In some cases the trim on the door post will have to be removed first. Some trim panels have push pins, you have to get under the head, pry up and out. The interior quarter panel ( 2 door sedans ) come out next. They may have some push pins, screws, or tabs on the back side of the panel. Either way some slight force may be needed. Don't pull too hard, if something doesn't give, get in there with a light and see what is holding it back. In some cars, the interior window crank handle will need to be removed in order to remove the panel. |
| Removing Console and Floor Shifter |
| Remove the center console next if so equipped. This can be a little tricky because the fasteners are often hidden under trim caps and go through the carpet into the floor pan. Look around the perimeter for small removable caps or panels. Same rule as before, remove all you can see and feel around for the rest. If it is a floor shift car you may need to remove the shifter arm or the plate around the shifter mechanism. |
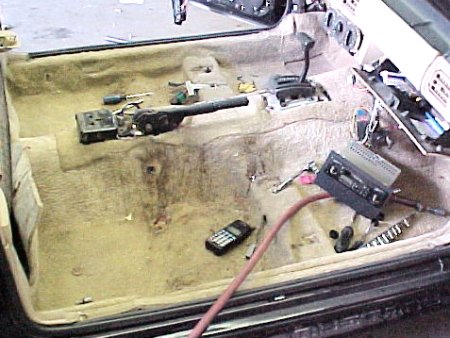
| Removing the Old Rug |
| With all this done, there should not be anything bolted to the floor through the carpet or around the edges of the carpet. Grab one corner and pull or roll the carpet to the center and out of the car. Lay it on the ground and put the new carpet on top. Take notice of hole location as well as overall size and shape. Also establish front to rear, or if it is multiple pieces, start with the rear section. |
| Top |
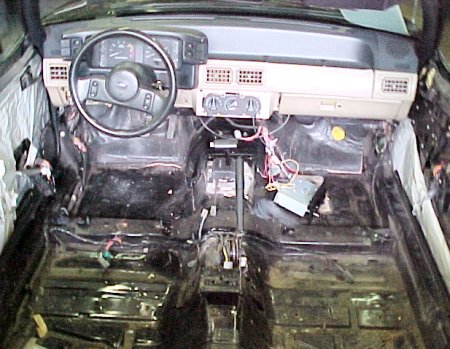 |
This is what you should expect to see with everything removed. Now is a good time to take a look at all electrical connections and inspect the floor pans for signs of rust of leaks. |
| Preparing and Laying the New Carpet in Place |
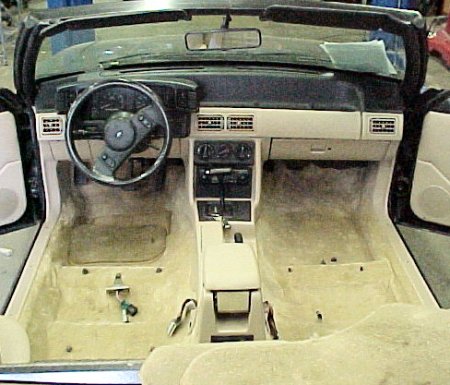
| The new carpet will be a little larger for trimming. Some people like to temporarily install the screws and hardware in the floor. This helps to make new holes once the carpet is installed. Lay the new carpet in the floor, get it centered left to right and front to back. The heal pad should be right under the gas / brake pedals. Start in the center and rub the carpet to the edges. |
| Cut Holes as Required in the Carpet |
| Cars with center consoles will have brackets mounted to the floor. Cut a long slit over the brackets. Work out to the edges, laying the carpet flat on the floor. Stand back and check for alignment and fit before cutting any holes. I like to start locating holes by folding one side over, find the hole, fold back over and make the hole with an awl or ice pick. Then trim around the pick with a good sharp knife. Cut one at a time, checking fit as you go. Work symmetrically, find the drivers seat belt, then passengers seat belt. Once you get to the edges and are happy with the look so far, refer back to your old carpet for total hole count |
 |
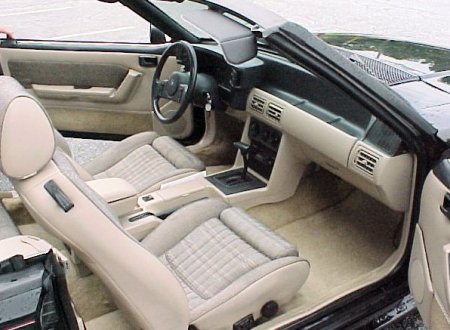
Now you can start to see the results of your efforts. All that's left is to resinstall the parts you removed earlier. |
| Trim the Edges and Reinstall Panels |
| As noted earlier, the carpet may be cut a little oversize. so trim along the door jamb, removing just enough carpet so the panels will fit in place. Install the kick panels, quarter trim, sill plates, seat belts (get them as tight as you can), rear seat, console, front seats and floor mats |
| Congratulations, You're Finished |
| That's it, Congrats, you have just installed the best automotive carpet on the market. It should look great, there may be some places that don't conform exactly to the floor, but they will over time with the heating and cooling that occurs naturally |
|
Text by Tim
Guill
|
| Top |
|
|
|